Motor Pedal Update Support
Motor replacment
Firmware Update
Motor diagnostics
MOTOR REPLACMENT PROCEDURE
-
Place your Motor Pedal on a table, face down. Remove the motor bonnet by unscrewing the three screws at the back of the pedal.
-
When the screws are unscrewed, slowly turn the pedal to the side while supporting the motor bonnet with your fingers.
The motor brace should fall into your hand, at which point you can carefully pull it out of the pedal and place it on the back of it.
-
Turn the pedal around so that the ribbon cable connecting the motor to the pedal is facing you.
Hold down on the motor brace and carefully unclip the ribbon cable connection, and remove the ribbon cable.
-
By firmly holding the motor brace, unscrew the two screws holding the motor.
-
Remove the old motor from the brace.
-
Insert the new one in its place.
-
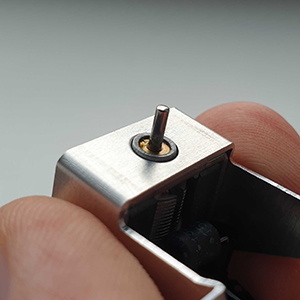
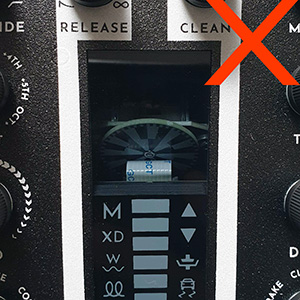
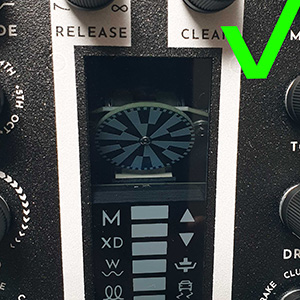
Make sure that the round part at the back of the motor goes through the hole at the back of the motor brace.
-
Screw back the screws holding the motor into the brace.

-
Place the motor on the back of the pedal. Undo the ribbon cable clip and place the ribbon cable into the connector so that the blue side of the cable is facing up. Close the ribbon cable clip.
-
Insert the motor back into the pedal.
-
Make sure the ribbon cable is not in front of the motor.
-
Screw back the motor bonnet.

-
Now the new motor needs to be calibrated.
Power on the pedal while holding down both the footswitch and the built-in expression pedal.
The Led bar will start to fill up yellow indicating that the pedal calibration is starting.
-
If the LED bar turns blue, that means the calibration process has started. Now the footswitch and pedal can be released. This process can take up to 25minutes.
-
If the LED bar flashes red and the engine light is blinking, that means there's an error and you should check if the motor swap steps were executed correctly or contact our customer support.
-
Once the motor calibration process has finished, connect your Motor Pedal to a computer using USB-C cable. Once connected, click the button below in order to reset the motor revolution counter.
Perform this operation ONLY if you have just swapped the motor of the Motor Pedal. If you perform this operation on a used motor the check engine indicator light on the pedal might display wrong information.
Empty string
Empty string
Pedal Data
Motor Uptime
123456
Motor revolutions
123456
Internal voltage
123456
Loading...
Motor History
| Date | Motor revolutions | Motor Uptime |
|---|---|---|
| 10.10.10 13:12:10:1236 | 123456 | 123456 |
| 10.10.10 13:12:10:1236 | 123456 | 123456 |
| 10.10.10 13:12:10:1236 | 123456 | 123456 |
| Total revolutions : 123456 | Total Uptime : 123456 |
FIRMWARE UPDATE
PREPARE
- First, prepare a suitable 9V DC center-negative power supply with at least 500 mA or higher. Daisy-chain power solutions are not recommended.
- Then, close any applications that may be using MIDI, such as DAWs or other MIDI controllers.
- And have a USB-C cable ready to connect your Motor Pedal to your computer.
CONNECT
- Power on your Motor Pedal using a 9V DC center-negative power supply and connect it to your computer using USB-C cable.
- Your computer’s operating system may (and may not, no worries about that) notify you that a new MIDI device - your Motor Pedal - has been connected.
- And depending on your browser, check if any pop-ups are asking you to enable the MIDI sysex messages.
- Then, click the Connect button to bring the pedal into firmware update mode. The LED bar will show a rolling animation, confirming that the pedal has entered firmware update mode.
- Now you can choose the latest firmware and click the Update Motor Pedal button to start the upate procedure.